Orienteering | FAQs | Your First Event | Our Maps
As a new orienteer you probably have many questions. The information on this page and in the Beginner’s FAQ will answer a lot of your questions and help you to be better prepared for your first outing.
Orienteering can be approached in many ways. Most beginners will start out by walking on one of the easier courses – White or Yellow.
After you’ve been at the sport for a while, you may want to become more competitive. Once at this level you will most likely exchange your hiking shoes for something lighter and faster. You will also probably adopt clothing that is better suited for running.
What is Orienteering?
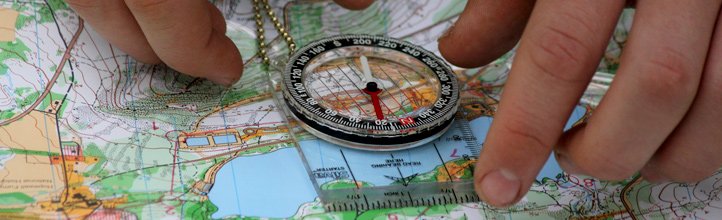
By definition orienteering is a sport involving a map and a compass, but that’s not really very helpful for someone new to the sport.
The map is a very detailed map of a section of woods or parkland. Streams, trails, hills, depressions, rocks, etc. are all mapped in great detail and very accurately located.
The goal of orienteering is to complete a course in point-to-point order. Starts are staggered and the person successfully completing the course in the least amount of time is the winner.
A typical orienteering event offers five, six, or seven different courses of varying difficulty. The courses are named using colors:
| White | beginners (2-3km) |
| Yellow | advanced beginners (2-3.5km) |
| Orange | intermediate (3-5km) |
| Brown | short advanced (3-4km) |
| Green | longer advanced (4-5km) |
| Red | even longer advanced (5-7km) |
| Blue | really long advanced (8-12km) |
The checkpoints you visit on the course are called controls. These controls are often shared by more than one course. You might see someone at your control and be tempted to follow them, but they could be on a different course!
Although we talked above about the fastest person winning, many people enjoy orienteering for the challenge it offers and are totally uninterested in their time. Likewise, many families go as a group on one of the easier courses.
Foot or Classic Orienteering is the most common form of events hosted by our club, there’s also Sprint-O, Trail-O, Bike-O, Ski-O, Canoe-O, Night-O, but we’ll save those for another time…

Your First Event
Registration
Registration for DVOA events is from 10:00 am – 1:00 pm, unless otherwise noted. Some events require pre-registration.
After you register go to the start area where you will be given a map and assigned a start time. Your course will be pre-printed on the map. Unlike many other races orienteering starts are staggered by a few minutes to avoid following. The last start time is 1:00 pm. The courses close and we begin picking up controls at 3:00 pm during EST, and 4:00 pm during EDT.
Fees to participate in a local event –
fees are for individuals or groups going together:
Members: $7
Non-members (not member of any USA orienteering club): $12
Junior (under 21): $7
Additional map for multiple people in same group: $2/map.
Map for second course on same day: same as first course
Note: No charge to borrow e-punch stick or compass. Require deposit of keys for loan of either item.
So, check out the FAQ, then pick a date from the schedule. Once you try orienteering, you’ll be hooked.
The Start
At the start you will be given a map and assigned a start time. Do not look at the map until your time is called. When your time is announced do the following steps:
- Turn the map over
- Look for the start triangle
- Orient your map to your direction of travel
- Figure out how you’re going to get from the start triangle to control #1
- GO!!!!
Go? Go where? To the left is a small section a map. We’ll use the first leg of the course as an example. The first thing to do is look for the start triangle, it’s the purple triangle. In this example the start triangle is on a trail junction. The start triangle is where you are on the ground and the map.
Plan a route to the first control. On most legs of an orienteering course there are often many route choices. If you talk to orienteers they will give you different (and maybe better) suggestions based on their experience level.
Once you find the first control check the number on the box and your course description to make sure it’s the correct control. Then insert the e-punch finger stick into the control box. You’ll hear a beep indicating the information of your visit has been recorded to the stick. Then repeat the above steps to find control #2, #3, etc.
More about the map
The obvious route choice is to take the trail heading NorthEast. You could stay on the trail until you reach the junction where two trails come in from the sides. From this point you could follow the trail going towards the Northeast for just a little ways until you get around the Green area. From there you could take a compass bearing and follow that to the control. Or when you get to the trail junction you could continue on until the dogleg to the right. From where the trail bends to the right you could take a compass bearing and head down the hill then up to the control. Or from the start you could follow the main Northeast trail to where the trail first bends to the right. From that point you could then follow the terrain features into the control.
Finish
Results
Beginner’s Frequently Asked Questions
If you have questions that are not answered by the FAQ, please feel free to contact us through our contact form or call the DVOA hotline 610-792-0502 for additional information. (Also, if you let the Webmaster know of any questions, they’ll be added so that future beginner’s can benefit – thanks!).
How do I find the event?
First, check out the schedule and select an event you would like to attend. The schedule lists basic directions as well as GPS coordinates for finding the park. If you need more specific directions contact the event director. Once you get close to the park, look for the orienteering O’ signs (shown below) to guide you to the parking area.

What should I wear orienteering?
Basically, whatever is comfortable. It is advisable to wear long pants and long sleeves to reduce exposure to insects and thorns.
What kind of shoes should I wear?
Hiking shoes are always appropriate, but many people wear trail running shoes. As your orienteering skills progress, you may want to move up to specially made orienteering shoes.
What other equipment do I need?
Each group should have at least one whistle, which is used only in an emergency. Whistles can be purchased at registration for $1.00. A compass is a very useful orienteering tool, but secondary to map reading skills. Beginners courses are designed such that you shouldn’t need a compass, so keep it in your pocket as much as possible. This will let you concentrate on your map reading skills. A limited number of compasses are available at Registration to rent for $1.00.
What do all those course colors mean?
- White – beginners. Length is generally 2 – 3km. Course is on trails and/or fields
- Yellow – advanced beginners. Length is 2 – 3.5km. Mostly trails and fields with some route choice
- Orange – intermediates. Length is 3.5 – 4.5km. Mix of off trail and trail, route choice, catching features
- Brown – short advanced course. Length is 3 – 4km. Off trail
- Green is an advanced course. Length is 4 – 5km. Off trail
- Red is a longer advanced course. Length is 6-8km. Off trail
- Blue is the longest advanced course. Length is 8 – 10km. Off trail (not always offered)
Which course should I go on?
We usually recommend that first time Orienteers go out on a White course. If you have some experience with map reading and have spent time hiking you might want to try a Yellow course. Since every course is different, talk it over with the event director before you start out.
What are Score events, Sprints, and Long O?
We sometimes offer special variations of the normal White, Yellow, Orange, etc. courses. In a Score O there are lots of controls and they can be found in any order. There is a time limit (usually 60 or 90 minutes) and the object is to find as many controls as possible within the time limit. Sprints are shorter courses that involve many controls and usually offer many route choice decisions. Long O courses are about 30% longer than normal distances and should have some extra long legs that offer a multitude of possible routes.
What happens when I arrive at an event?
Find the registration table, sign in, and pay the map fee of $7.00 per map for members, scouts, & other youth groups and $12.00 per map for non-members. Then proceed to the start and check in with the start crew. They will give you a map and assign you a start time. When your start time is announced, off you go!
What is Epunching?
Most DVOA events now feature electronic timing that we call “epunch”. With epunch, you will get your results as soon as you finish, as well as “split” times to each control on your course. You will need to carry an “e-card” (actually a small plastic stick that you can wear on a finger) that you can buy ($40) or rent at Registration (included in registration fee-require key deposit for loan). This e-card is momentarily inserted into a hole in special boxes to collect the timing information–also called “punching the box”. A successful “punch” is indicated by a beep and flashing light on the box.
So how do I do epunching?
After registering for the event check in at the epunch computer table so they can enter your information into the system for the day’s event. Before starting your course, make sure to punch the “Clear” box, then the “Check” box (found near epunch registration and/or the course start) to wipe old data from your e-card. To complete the course, you need to first punch the Start box, then punch a box at every Control on your course, then finally the Finish box. Don’t forget to punch the finish box! After finishing, take the e-card back to the epunch registration table and the information that is now stored in it will be downloaded into the event computer for tabulation. You will get a printout of your time and splits… check them to make sure they make sense.
How do I find the event director?
Ask anyone around you. If they don’t know, keep asking. Orienteers like to see new people, so are generally ready and willing to help a newcomer.
I don’t have the faintest idea how to read a map. Will there be someone available to help me the first time?
Yes – tell the event director you are a beginner and need some instruction. They will either help you directly or arrange for someone to help. If you know in advance which event you will be attending, email the event director prior to the event and make arrangements for instruction directly with the event director.
Can I go as part of a group?
Yes – Groups are always welcome and they can share a map, although if desired a map can be purchased for each member of the group. If you are bringing a large group and want several maps it’s a good idea to let the event director know several days in advance so he has plenty of maps available.
Is there anything I need to be cautious about in the woods?
The Delaware Valley has high concentrations of deer ticks that can carry Lyme’s disease. Chiggers are also found in some of the areas we use. Wearing long pants and long sleeves can help keep them away. Sprays with DEET and other types of repellents are effective. It is always a good idea to check yourself very carefully when you are finished. In late summer bees sometimes become aggressive. Take necessary precautions if you are allergic to bee stings. Poison Ivy is common in some areas. (Poison sumac is very rare and Poison Oak doesn’t grow in this area).
Beyond the Beginners Courses…
When is it time to move up to a more difficult course?
A common measure is when you complete a normal course in under an hour you may be ready to move up to the next course. Courses beyond Yellow are going to force you off the trails so there are a few more things to learn before you go off into the woods.
What is a “catching” feature?
A catching feature is an obvious landmark, often linear (trail, stream, road) that is behind the control feature. It acts as a “catching” feature because if you miss the control you will encounter the “catching” feature within a very short distance beyond the control.
What is a “Handrail”?
A handrail is a linear feature like the edge of a field, a stream, a stone wall… or possibly something a bit less obvious like the steep part of a hill, or the edge some linear stony ground. It can be used to help keep you going in the right direction without using a trail.
What is “Aiming Off”?
When navigating toward a feature it is sometimes an advantage to intentionally aim slightly to the left or right side if there are distinct features on that side that will help in navigating to the less obvious control feature. This is especially helpful if you are hitting a linear feature (stream, trail, etc) and need to know whether to go left or right when you arrive.
Where can I learn more about orienteering?
There are numerous sites on the web offering how-to advice for orienteering. An excellent resource is Heather William’s Page. Another site explaining map reading and using the compass is Kjetil Kjernsmo’s How to use a compass